How to build PC
Alright, let’s make this guide to building a PC sound more approachable and less like a technical manual!
🖥️ Building Your Dream PC: A Simple Step-by-Step Guide for Beginners
Ever thought about having a computer perfectly tailored to you? Building your own PC might sound like something only tech experts can do, but trust me, with the right parts and a little guidance, anyone can do it! You get to pick exactly what goes inside, whether you’re a hardcore gamer, a creative pro, or just want a super-smooth web browsing experience. Let’s break down how to build your very own PC from scratch.
🛠️ 1. Gathering Your PC Dream Team (The Components You’ll Need)
First things first, you need to collect all the players for your PC dream team! Here’s a rundown of the essential parts:
1.1. The Brains: Processor (CPU)
Think of the CPU as the super-smart brain of your computer. It’s in charge of running all your programs. The two main brain builders are Intel and AMD, and they both offer different kinds of brains depending on what you need your PC to do.
- Intel Core i7/i9 or AMD Ryzen 7/9: These are the rockstars for serious gaming and creating cool stuff like videos and graphics.
- Intel Core i5 or AMD Ryzen 5: Great all-around performers for everyday tasks and some fun gaming.
1.2. The Visual Powerhouse: Graphics Card (GPU)
If you’re into gaming with awesome visuals, editing videos, or working with 3D designs, you’ll need a dedicated graphics card. The big players here are Nvidia and AMD.
- Nvidia GeForce RTX 30/40 series or AMD Radeon RX 6000 series: These are the heavy hitters for top-tier gaming and demanding creative work.
1.3. The Command Center: Motherboard (MOBO)
The motherboard is like the central nervous system, connecting everything together. Picking the right one is super important! Make sure it’s compatible with your CPU, graphics card, and everything else.
- CPU Socket Match: Double-check that the motherboard’s socket fits your CPU (like LGA 1200 for Intel or AM4 for AMD).
- Size Matters (Form Factor): Standard ATX boards give you more ports and room to grow, but smaller options like Micro ATX or Mini ITX are great for compact PCs.
1.4. The Short-Term Memory: RAM (Memory)
RAM is like your computer’s short-term memory, holding data for quick access. For most modern PCs, 16GB of RAM is a sweet spot, but if you do a lot of video editing or run virtual machines, you might want to go for 32GB or even 64GB.
- DDR Generations (DDR4 vs. DDR5): DDR5 is the newer, faster type, but DDR4 is still very common and often more budget-friendly.
1.5. The Long-Term Storage: SSD/HDD
You’ll want a Solid State Drive (SSD) for your operating system and main programs because it’s way faster than an old-school Hard Disk Drive (HDD). A lot of people go for a smaller, speedy SSD (like 500GB) and a larger HDD (like 2TB) for storing tons of files.
- Super-Speedy NVMe SSDs: These are the fastest storage around, plugging directly into a special slot on your motherboard.
1.6. The Power Source: Power Supply (PSU)
Your PSU needs to provide enough juice to all your components. Don’t skimp on this – a weak PSU can cause all sorts of problems!
- Wattage Wisdom: For most builds, a 750W to 1000W PSU should be plenty.
- Efficiency Matters (80+ Certification): Look for the 80+ label – it means the power supply is efficient and won’t waste a lot of energy.
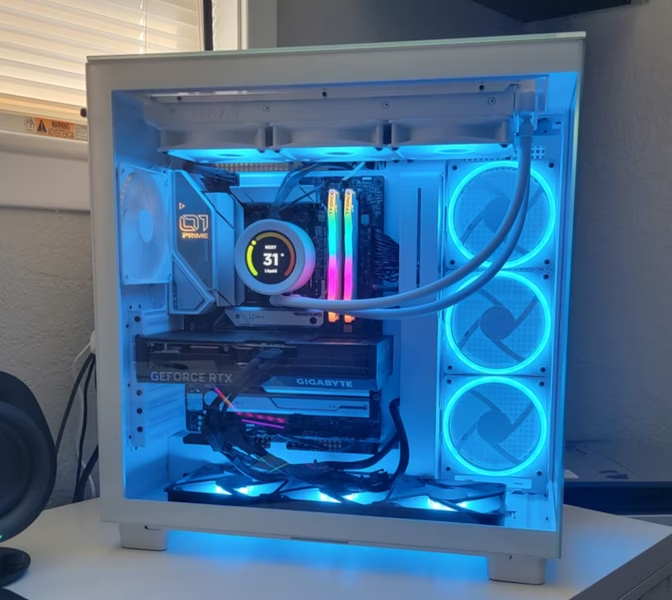
1.7. The Home: Case
The case is where all your precious components live and stay cool. You’ll want one with good airflow and enough space for your motherboard, graphics card, and storage.
- Case Sizes: Full ATX cases are roomy, while Mid Tower and Mini ITX cases are perfect for smaller setups.
1.8. Keeping Cool: Cooling System
Keeping your PC from overheating is key for good performance and making it last longer. You can choose between air cooling (fans) or liquid cooling (with radiators).
- Air Cooling: Easy to install and usually more affordable.
- Liquid Cooling: More efficient at keeping things cool but can be pricier and a bit more involved to install.
1.9. The Extras: Peripherals
Don’t forget the essentials like a keyboard, mouse, monitor, speakers, and any other gadgets you might need!
🔧 2. Setting Up Your Building Zone
Before you start putting things together, find a clean, open space to work. A big table is ideal. To protect your delicate parts from static electricity, grab some anti-static materials. An anti-static wristband is a great way to keep yourself grounded and prevent accidental damage.
🔨 3. Let’s Get Building! (Assembling the Components)
3.1. Installing the CPU (The Brain Surgery)
Start by carefully placing the CPU into the motherboard socket. Gently lift the lever on the socket, line up the little arrow or triangle on the CPU with the mark on the socket (it only fits one way!), and gently place it down. Then, lower the lever to secure it.
3.2. Applying Thermal Paste (The Heat Helper)
Most CPUs come with thermal paste already applied to the cooler. If yours doesn’t, squeeze a tiny pea-sized amount of thermal paste onto the center of the CPU. This helps the cooler transfer heat away from the CPU.
3.3. Installing the RAM (Adding Memory Sticks)
Insert the RAM sticks into the long slots on the motherboard. See those little notches on the RAM? Line them up with the notches in the slots, and then push down firmly on both ends of the RAM stick until the clips on the sides snap into place. You should hear a little click.
3.4. Installing the Motherboard into the Case (Mounting the Command Center)
Carefully place the motherboard inside the case, lining up the screw holes on the motherboard with the little standoffs (they look like tiny screws) already in the case. Screw the motherboard in place, making sure it’s snug but not too tight.
3.5. Installing the Power Supply (Plugging in the Juice)
Put the PSU into its designated spot in the case (usually at the bottom or top). Screw it in securely. Now, gently route the power cables around the case – try to keep them tidy for better airflow later. Don’t plug them into anything yet!
3.6. Installing the Storage Drives (Adding Your Digital Storage)
Mount your SSD and HDD into the drive bays or brackets inside the case. Connect the data cables (SATA cables) from the motherboard to your HDDs and regular SSDs. For those super-fast NVMe SSDs, just slide them into the special M.2 slots on the motherboard.
3.7. Installing the Graphics Card (Adding the Visual Muscle)
Find the longest PCIe slot on your motherboard (it’s usually a different color). Line up the graphics card and gently push it down until it clicks into place. Secure it with screws to the case, and if your graphics card needs extra power, connect the appropriate cables from the PSU.
3.8. Connecting All the Wires (The Cable Jungle)
Now comes the slightly fiddly part: connecting all the cables! Plug in the power cables from the PSU to the motherboard, graphics card, and storage drives. Connect the data cables from your SSDs and HDDs to the motherboard. Finally, connect the little cables for the front panel buttons (power, reset), USB ports, and audio jacks on your case to the correct pins on the motherboard (your motherboard manual will be your best friend here!).
⚡ 4. Powering Up for the First Time (The Moment of Truth)
Once you’re sure everything is connected, plug your PC into the wall and hit the power button. You should hear the fans start spinning and see some lights come on. If all goes well, your monitor should show the motherboard’s startup screen (the BIOS), which means your PC is alive!
💾 5. Installing the Operating System (Giving Your PC a Soul)
Now it’s time to install the software that makes your PC work – the operating system. Most people go with Windows 11 or Linux. You’ll need to create a bootable USB drive with your chosen OS and follow the instructions that appear on your screen when you start your PC.
- Windows: Head to Microsoft’s website and download their installation tool to create a bootable USB drive.
- Linux: Pick a version (like Ubuntu) and follow their installation guide to put it on a USB drive.
🎮 6. Installing Drivers and Software (Making Everything Work Together)
Once your operating system is installed, you need to install the drivers – these are like translators that help your OS talk to your hardware. You’ll definitely need:
- Graphics Card Drivers: Get these from Nvidia or AMD’s websites.
- Motherboard Drivers: These usually come on a disc or can be downloaded from the motherboard manufacturer’s website (for things like the network port and sound).
- Peripheral Drivers: If you have special keyboards or mice, you might need to install their drivers too.
After the drivers are in, go ahead and install your favorite software and games!
🚀 7. Fine-Tuning and Enjoying Your Creation (The Victory Lap)
Your PC is built and running! Now’s the time to install any updates for your operating system and drivers, tweak your settings for the best performance, and start enjoying your very own custom-built machine! Whether you’re diving into the latest games, creating amazing content, or just enjoying a super-fast web experience, you did it!
🌟 Final Thoughts
Building your own PC is an awesome project that gives you total control over what’s inside. Not only will you end up with a computer perfectly suited to your needs, but you’ll also learn a ton about how computers work. So go ahead, give it a shot! You might just surprise yourself. Enjoy your new powerhouse!